The Truly Magical German Short Row
I have a confession to make. For years, I have tried to love short row heels and toes without success. I do not like wrapping stitches, I like picking up wraps even less, and I detest the holes that inevitably show at the points where I turned. I try, I rip, and I end up going right back to my favorite provisionally cast on toe and gusseted heel. But I also confess, that there are some advantages to short row heels and toes. For example, they’re nicely balanced for adding contrast colors (something that’s not the case with gusseted socks).
I thought I was destined to a life without pretty contrast heels, and then, I was bitten by the Dreambird Shawl bug. What does a shawl have to do with socks? Simple. Short rows. The thing that makes Dreambird work is short row shaping. And the thing that keeps you from losing your sanity after the eleventy-billionth wrapped stitch is a delightful little technique called German short rows.
What are German short rows, you ask? They are quite simply the most magical knitting technique since the invention of the knit stitch. They are the answer to your short row prayers and a reason to give short row heels another go. They are so ridiculously simple you will wonder why it works and why you didn’t think of it yourself. They may be the rainbow unicorns of the knitting world. Who invented German short rows, you ask? I have absolutely no clue but I’m guessing it was a German knitter who hated short row wraps as much as I do.
The technique revolves around something called a Double Stitch, which is really just a regular stitch pulled out of shape. The process of pulling that stitch out of shape closes the hole made at the point of a short row turn. The process completely defies logic (it would make Mr. Spock’s head explode) but stay with me and I promise you something magical in the journey. For our purposes, I will explain the technique in the context of a sock toe but the same technique will work on a heel (or a shawl or sweater) just as easily.
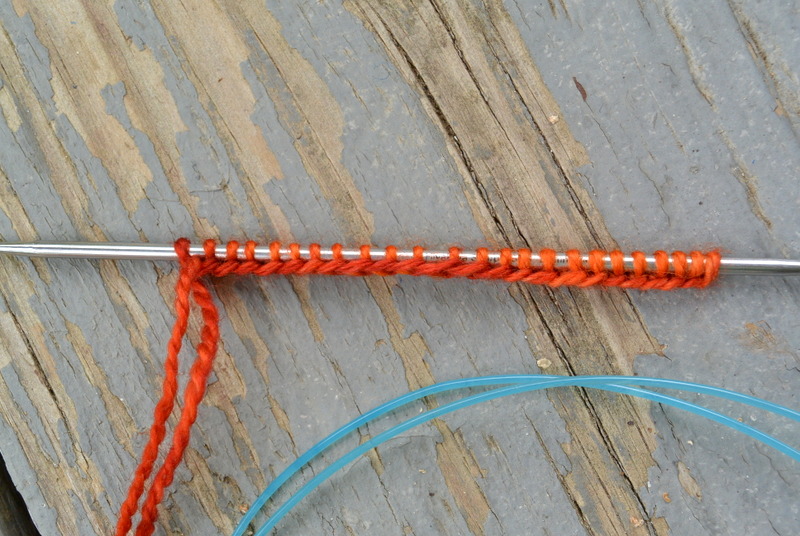
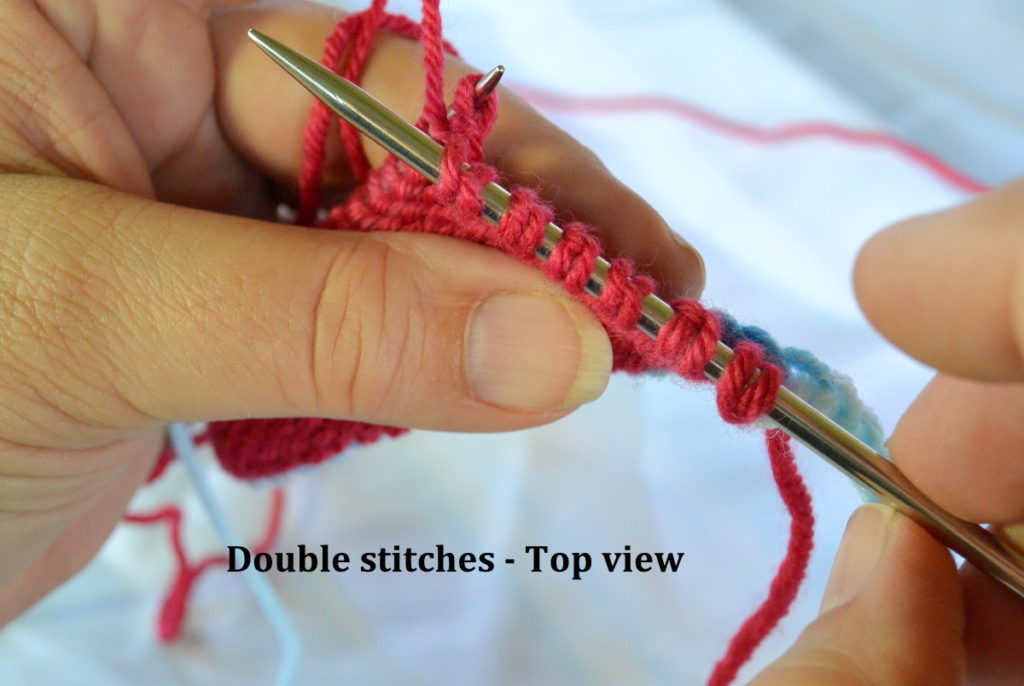
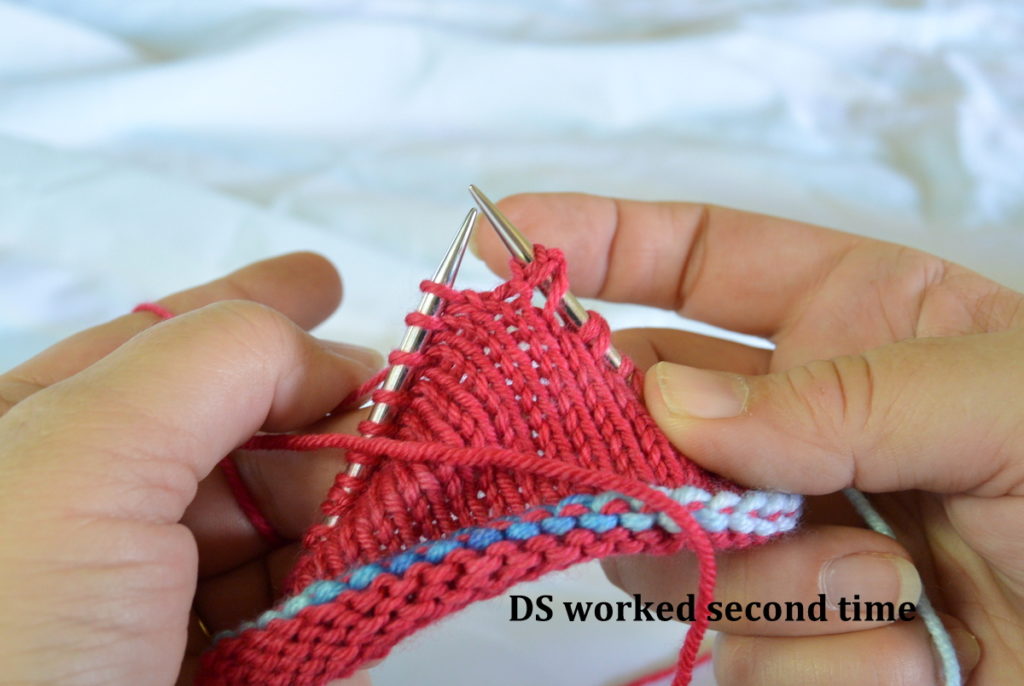
To make a double stitch, work to the point in the pattern where you would ordinarily wrap a stitch. Now, instead of doing the yarn-moving slip-stitch-wrapping short row dance with that stitch, knit or purl the stitch (depending on the pattern) then turn your work. No wrapping needed. Don’t write me off as crazy just yet. With your work turned, bring the working yarn to the front and slip purlwise the stitch you were supposed to wrap. Carry the working yarn over the top of your needle and to the back of the work. Pull the working yarn until the legs of the stitch below the slipped stitch are exposed, forming two little legs.
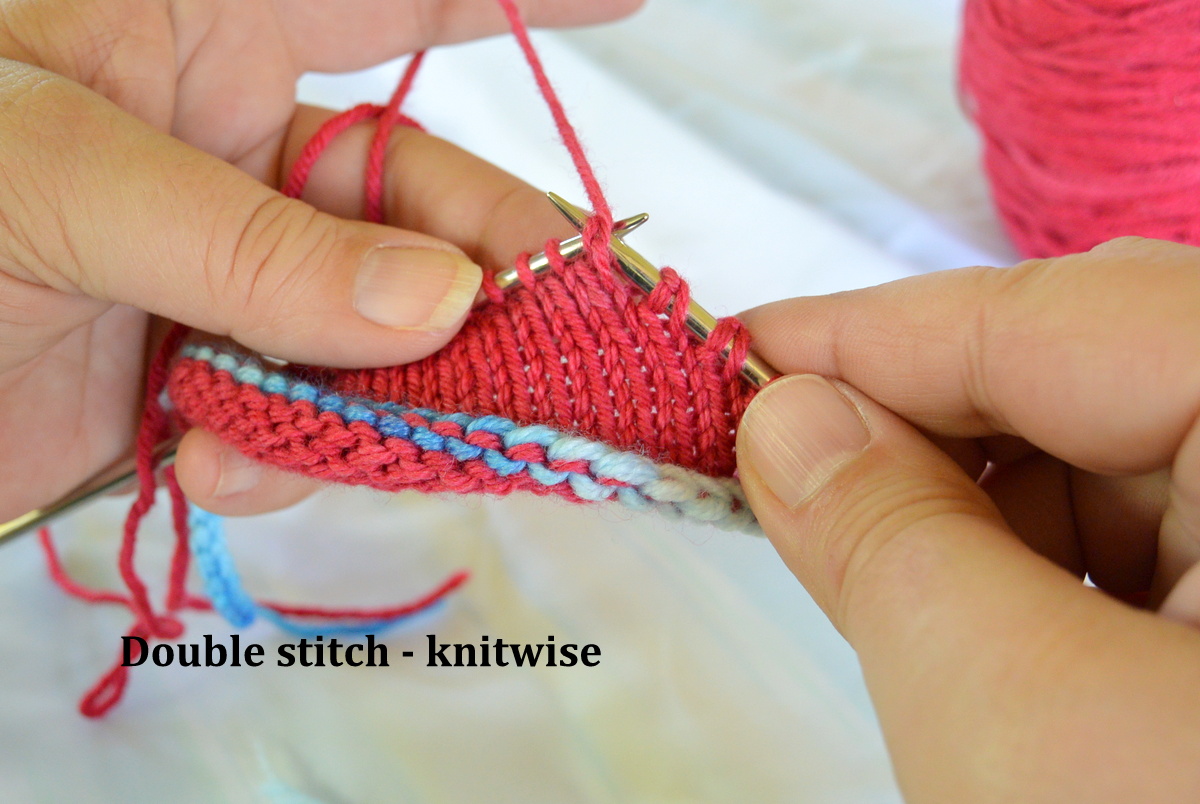
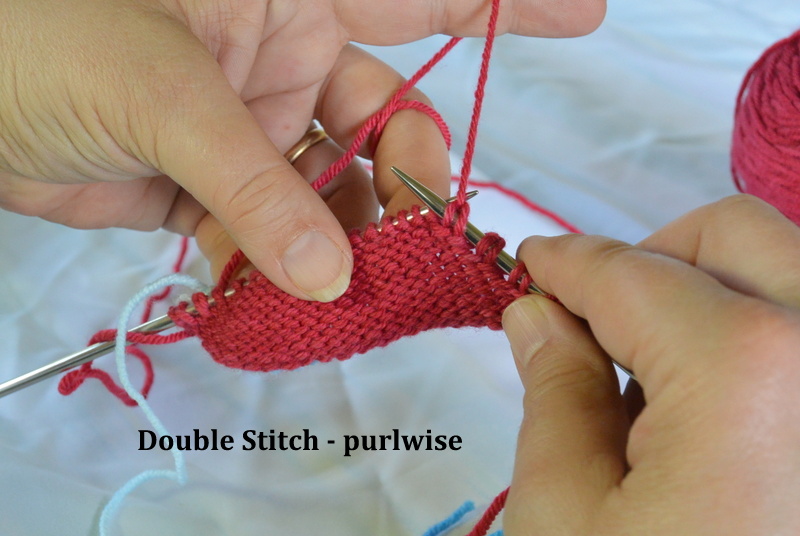
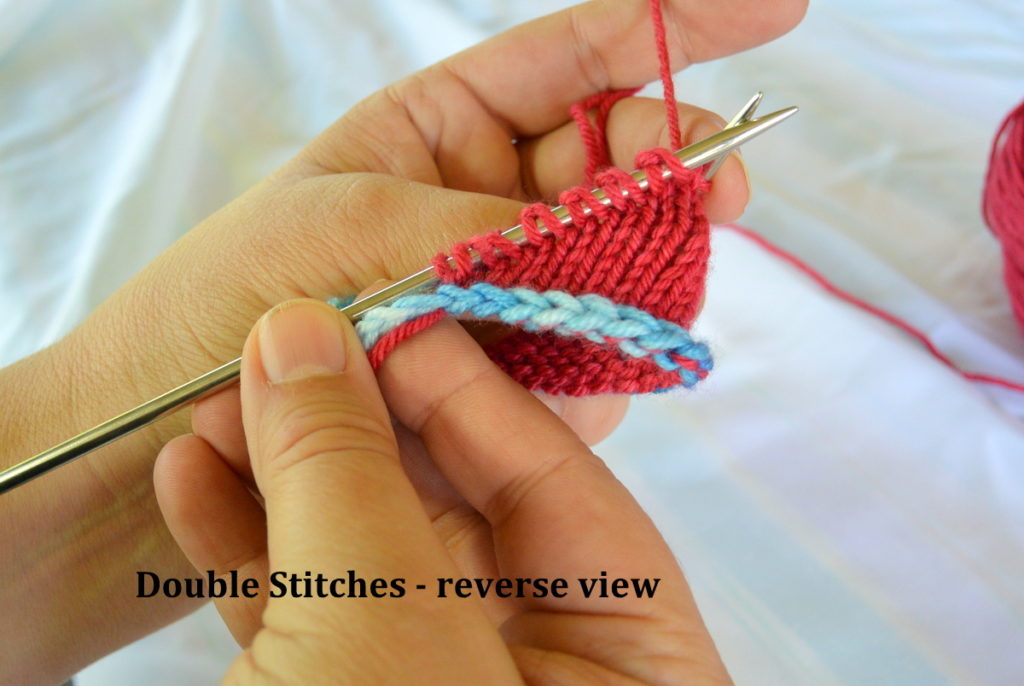
On top of the needle, you will see a little, crossed bit of yarn that indicates the intersection of the slipped stitch and the stitch below it. On the back of the needle, you will see the two legs of the slipped stitch. If it sounds weird, just think back to when you first started knitting and you accidentally added stitches to your row but didn’t know how. Remember, that how turned out you were making new stitches because you carried the working over the top of the needle instead of under it? Well, that is exactly what you are doing here. Only this time, you’re doing it on purpose.
Now, knit or purl the next stitch (as the pattern indicates) to lock the Double Stitch in place. That’s it. One Double Stitch created. No wrapping, no slip stitch tango, no muss, no fuss. The Double Stitch sits just a little differently depending on whether you worked a knit or a purl as the next stitch, but the magic works just the same.
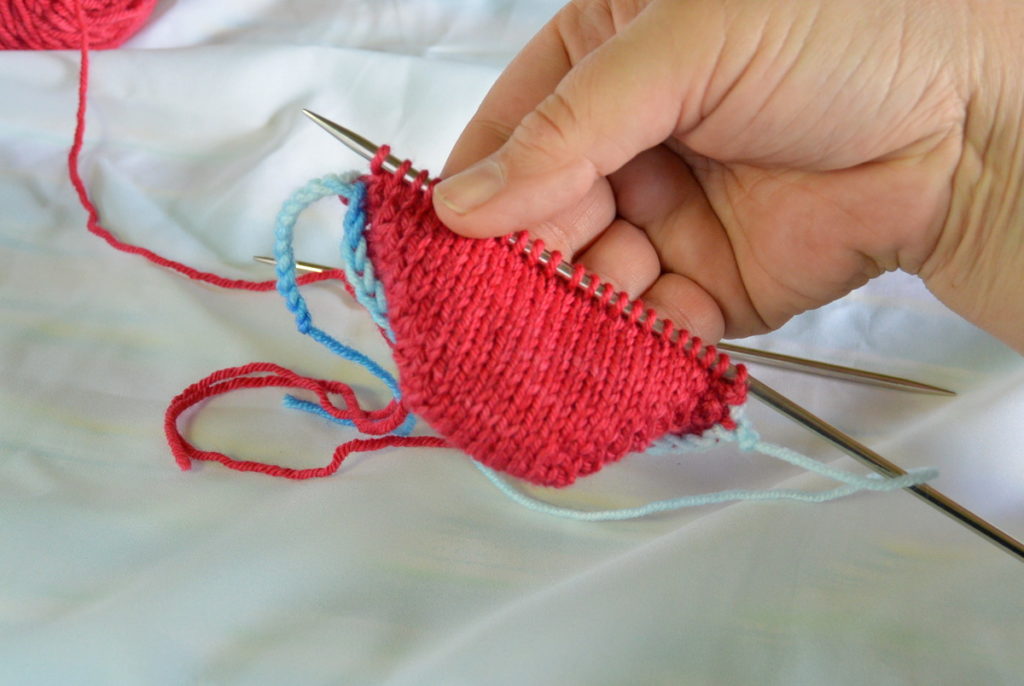
To work a short row toe, purl to the end of your cast on row and turn. Make a Double Stitch of the first stitch (the one that should have been wrapped), knit to the end of the next row, and turn. Make another Double Stitch, purl to the first Double Stitch, and turn. Make another Double Stitch, knit to the next Double Stitch, turn. Now, continue making a new Double Stitch, knitting or purling to the next Double Stitch, and turning until you have reached the number of stitches that are to be left unworked in the center of the heel. Take a moment to admire your lovely polygon, delighting in the fact that you haven’t wrapped a single stitch, and noticing the magic practically emanating from the stitches.
Time to “unwrap” those slipped stitches that you didn’t wrap. The next steps will vary a little from pattern to pattern, depending on whether you have an odd or even number of unworked stitches between the Double Stitches. I will show you what to do when there is an even number remaining because that process requires one extra step. If you have an odd number remaining, just omit the first step.
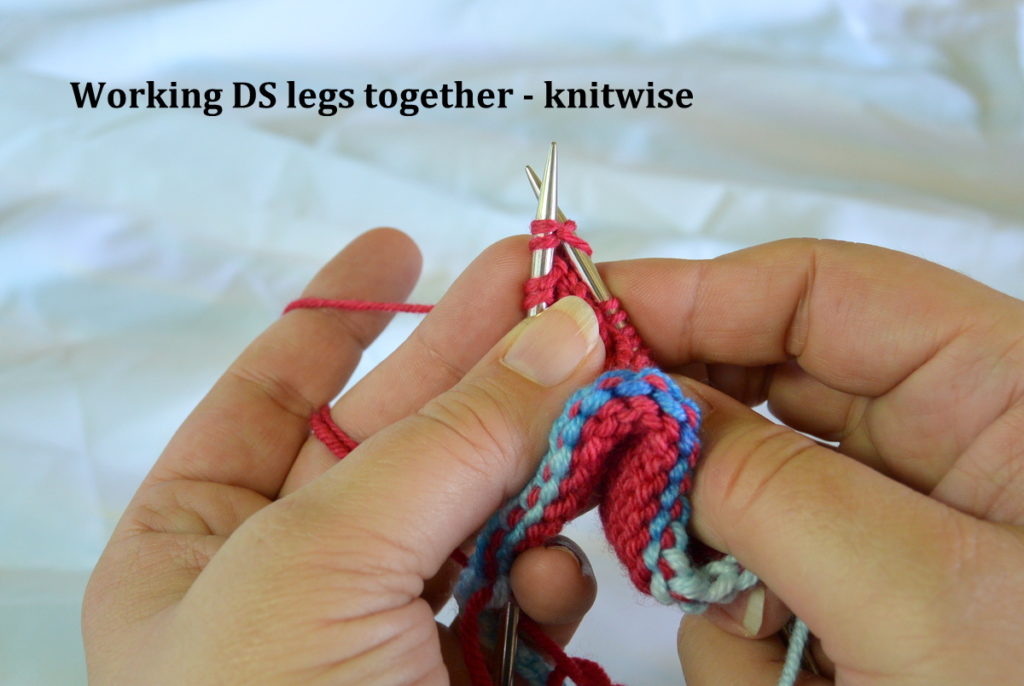
In our example, we ended our toe on a Wrong Side row. With your work turned, make a Double Stitch and knit to the next Double Stitch in the row. Work that Double Stitch by knitting both legs of the stitch together the way you would k2tog but without actually decreasing a stitch.
Turn your work. Make a double stitch. Yes, I know that is the Double Stitch you just worked and it looks a little bulky but you’ve trusted me this far so stay with me a little longer.
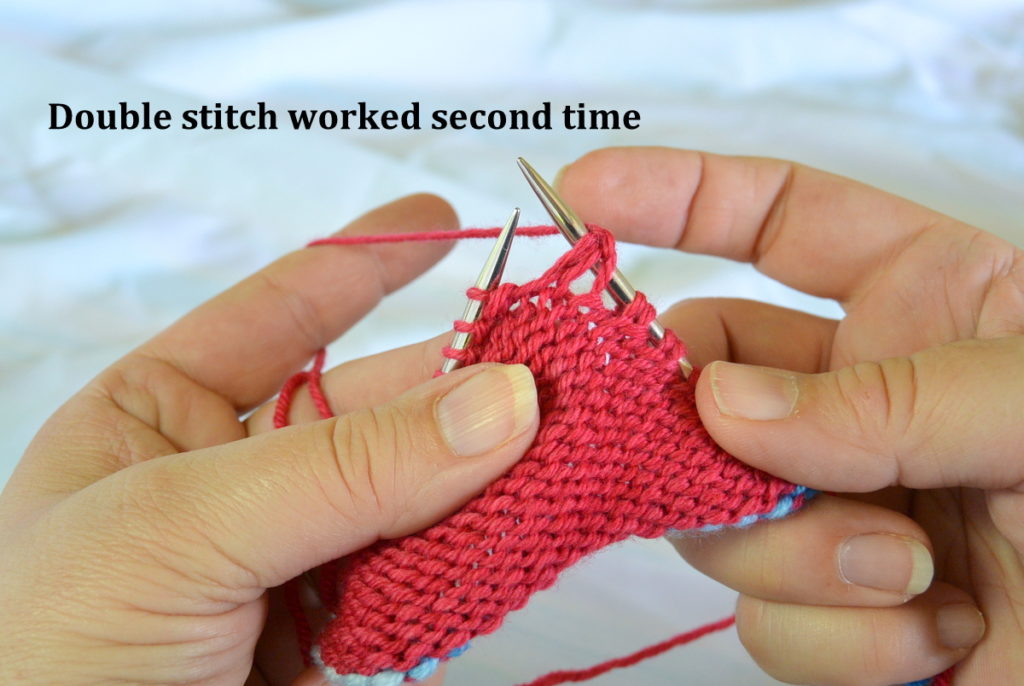
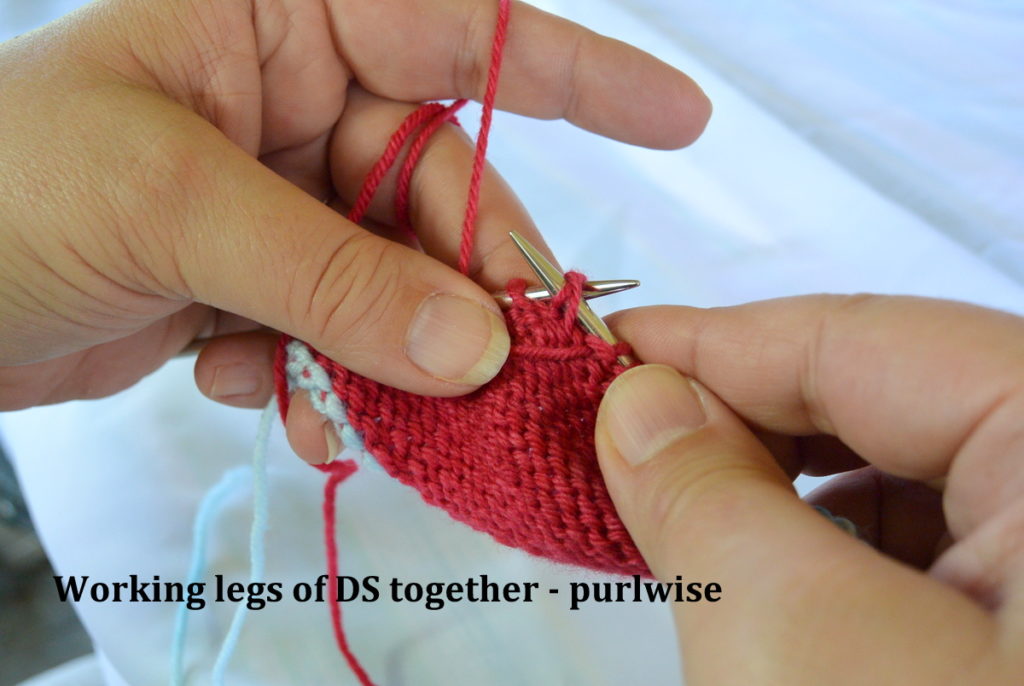
Purl to the next Double Stitch, then work the next TWO Double Stitches just like you did in the last row; purling two legs together as a single stitch. Turn. Make a new Double Stitch (from the last Double Stitch worked), knit to the next Double Stitch, work the next two Double Stitches as you did before, and turn. Repeat this process, creating one new Double Stitch and working two Double Stitches, until you have worked all the Double Stitches. On the last turn, you won’t need to create a new Double Stitch.
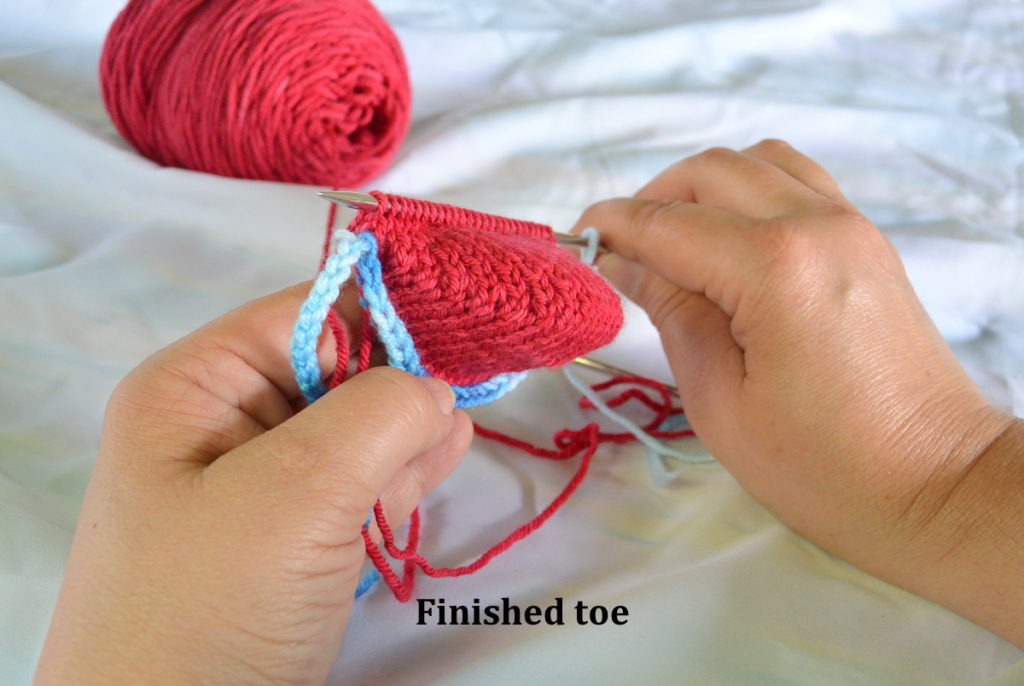
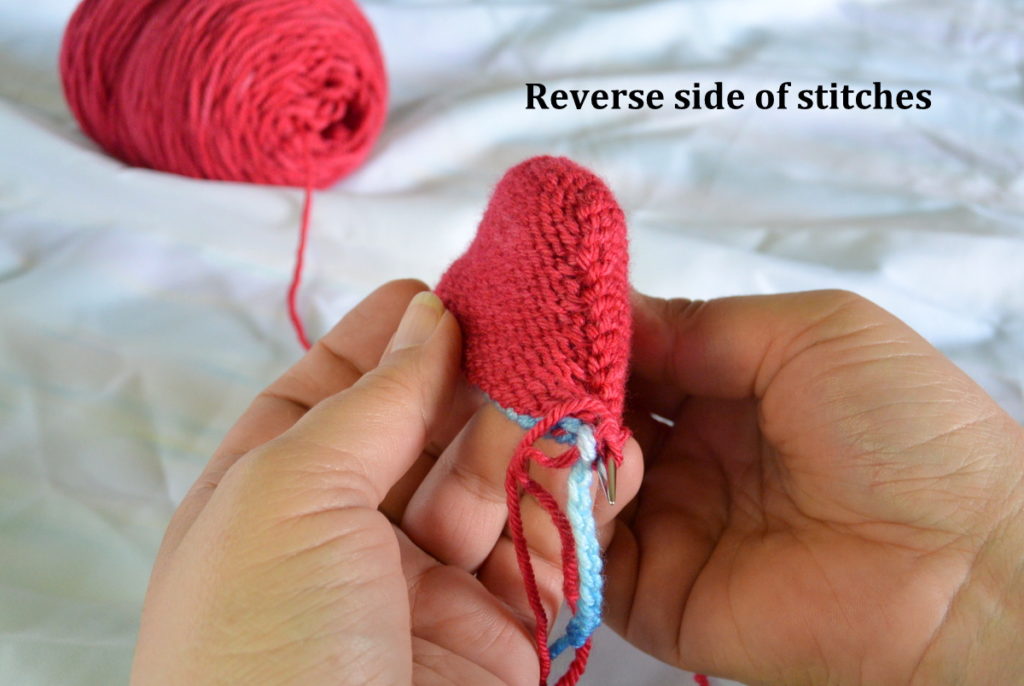
You have my permission to squeeeee with joy over your beautiful toe. Notice that the turning points are nicely closed (much better than the results from even double wrapped Wrap & Turn short rows). And if you feel the “seam” (for lack of a better word), you will see that it isn’t as bulky as you thought it would be.
See? I told you it was magical!
Want a pattern to try out this technique? Hold the Pickles is perfect.