
I have been fascinated by felting since I first started to knit. I love the bit of surprise that results when you put your knitting in water. The results can be surprising sometimes. To help you sort out some of the mysticism and magic that is felting, here are a few things I have learned in my experiments with shrinking wool.
Lesson 1 – All wool doesn’t felt the same.
Different fibers, different brands and even different colors of the same brand will felt at different rates. Annoying, confusing, logic-defying but sadly true. To be certain of results, it is advisable to, and yes, I know you are going to hate me for saying this, knit and felt a swatch. This is recommended for every yarn that you work with and wouldn’t hurt for each individual color since dyes used can affect the felting rate.
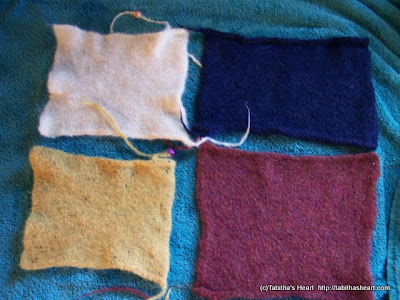
To get an idea of how much variation there is between different brands of yarn, I conducted an experiment. For my test, I knitted four squares in worsted weight 100% wool. I used the same needles for all four squares to achieve as close to the came gauge as possible.
The dark blue square is worked in Lion Brand Wool; the yellow one is worked in Cascade 220 heather; and the rose and cream squares are both worked in Paton’s Classic Merino. To make each square, I cast on 40 stitches using size 8/5.00 mm needles and worked in stockinette stitch until each piece was about 7 inches/18 cm in length. Each sample was then carefully measured and the results recorded. The samples were then felted by hand as described below and dried without any stretching of the fabric. The samples were then re-measured and the amount of change calculated.

Lion Brand Wool Color – Navy
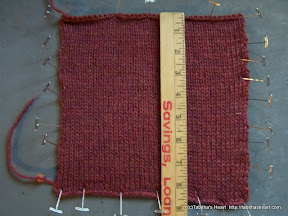
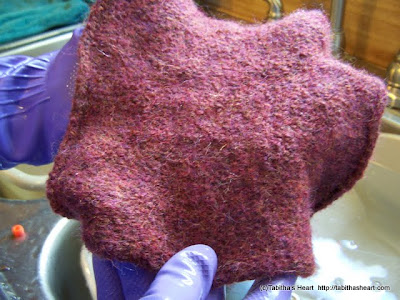
Paton’s Classic Wool Color – Rose Heather

Cascade 220 Tweed – Color Yellow
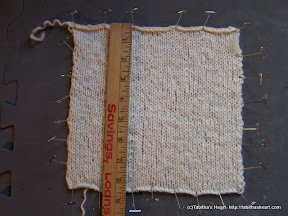
Paton’s Classic Wool Color – Cream
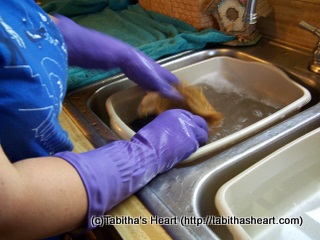
Hand Felting Method
The idea behind felting is that with the correct amount of temperature change and agitation the fibers of wool will begin to cling to each other. To get results that are as uniform as possible, all four samples were felted by hand at the same time using this method.
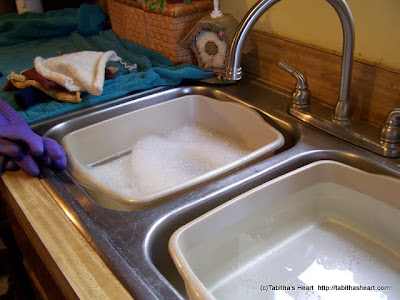
1. Two identical plastic pans were prepared; one pan was filled with hot water with a tablespoon of wool wash; and the second pan was filled with cool tap water.
2. All four samples are placed in hot water and agitated by squeezing together for 3 minutes.

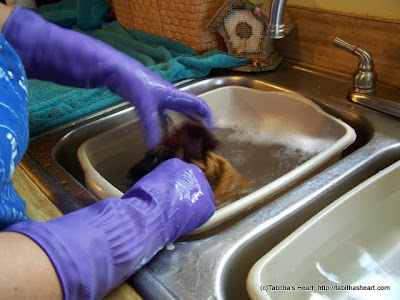
Notice the left hand was caught in motion.
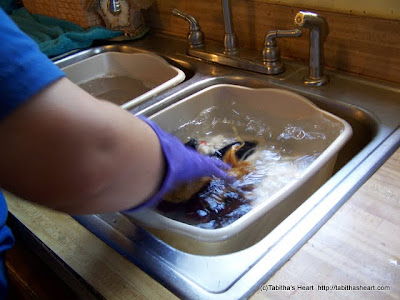
3. Samples were then plunged in cool water for 30 seconds.
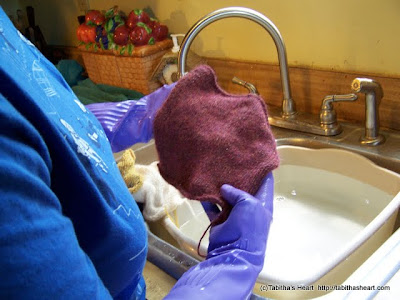
4. Each sample was examined to determine degree of felting.
5. Steps 2 – 4 of the process were repeated until the fibers of the sample looked uniform and you could no longer see the individual stitches.
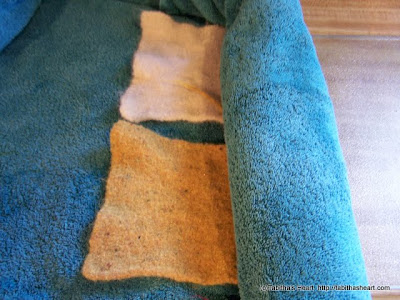
This sample is felted enough.

This sample needs more agitation.
6. When a sample was sufficiently felted, it was gently squeezed to remove the excess water and placed on a towel until all four samples were completely felted. The time it took to felt the sample was recorded.

7. When all samples were felted, the four samples were rolled in the towel to remove more of the water, measured and then laid on a drying rack to dry.
8. When completely dry, each sample was measured again and the results recorded.
Below is a table that outlines the results.
Blue sample
Length Before felting – 7 inch
Length After felting – 5 inch
Percent change 28.6%
Width Before felting – 9 inch
Width After felting – 8.5 inch
Percent change – 5.6%
Yellow sample
Length Before felting – 8.25 inch
Length After felting – 5.25 inch
Percent change – 36.4%
Width Before felting – 9 inch
Width After felting – 6.5 inch
Percent change – 27.8%
Rose sample
Length Before felting – 8.5 inch
Length After felting – 6.25 inch
Percent change – 26.5%
Width Before felting – 8.5 inch
Width After felting 7.5 inch
Percent change – 11.8%
Cream sample
Length Before felting – 8.5 inch
Length After felting – 5.25 inch
Percent change – 38.2%
Width Before felting – 9 inch
Width After felting – 7 inch
Percent change – 22.2%
As you can see, there is a surprising amount of difference between samples. There are some general rules but there is enough difference that it is advisable to felt a swatch any time you use a different yarn. I used wool for all of my samples, but the principles apply to all feltable animal fibers. With each fiber or combination of fibers, with each brand and with each color of the same brand you will see some differences in the rate at which they felt.
In the next part of the tutorial, I will share you some interesting discoveries about felting times.
*Yarn for cream sample was from a ripped project so gauge might account for some of the difference between the Rose and Cream samples.
Measurements were adjusted on 17 Apr 2011 to reflect dimensions after samples were completely dry.
I love the orderly, logical and mathmatical way you report your findings. I, however, just throw stuff in the washer and hope for the best. 🙂
I guess that’s why your stuff turns out prettier than mine.
Thanks for the great information! I had no idea there would be that much difference.