
And you can dye too, for all I care.*
In Sunday’s post, we got our yarn ready for dyeing. Today we play with dye. We will be using two colors as the finished product will be a striped, felted purse. We are using Kool-Aid Lemon-Lime and Berry Blue as our dyes. So here is the process for dyeing yarn in your kitchen with the help of a preteen.
Step 1
The yarn must be thoroughly wetted so it will absorb the color. 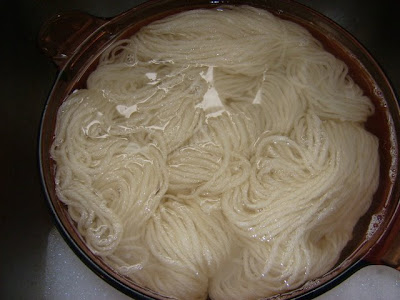
To do this, soak the yarn in lukewarm water to which you have added a couple of drops of Dawn dish washing detergent (use the plain blue Dawn not the fancy shmancy kinds)
Step 2
While the yarn is soaking, it is time to mix your dye. 
You will need one package of Kool-Aid per ounce of yarn. We used one extra package for good saturation. Each hank was approximately 4 ounces so we started with 5 packages of Kool-Aid. Mix the Kool-Aid with enough water to dissolve it but the ratio of water to dye is not critical.
Mix thoroughly.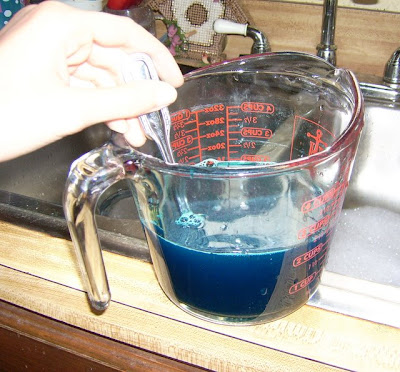
You want the dye to completely dissolve in the water. Otherwise, you might have dark or oddly colored spots on your yarn.
Step 3
Pour the dye over the yarn.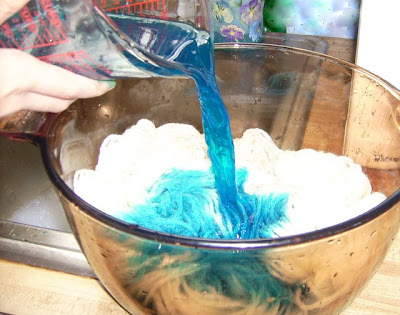
Remove yarn from soaking water and place it in a microwave safe bowl. Pour the dye evenly over the yarn until the yarn is just covered by liquid. If you don’t have enough liquid in your dye solution, add a little water to bring up the volume. 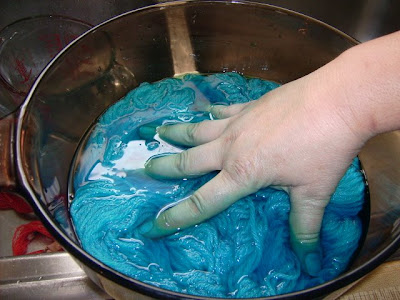
Push down slightly on yarn to make sure that it is completely covered with dye solution and that there are no air pockets in the middle of the hank.
Step 4
Heat set the dye. 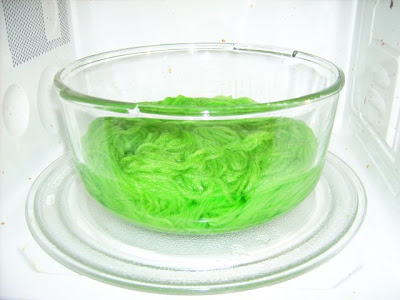
Heat on full power for two minutes. Allow yarn to cool for two minutes. Repeat the heating and cooling cycle until all the dye is absorbed and the water is clear. 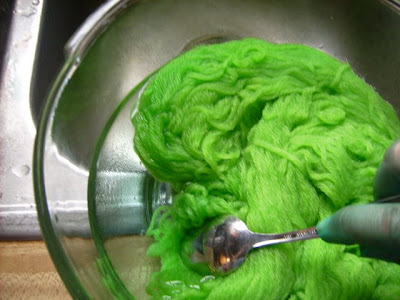
Remove yarn from microwave and allow to cool. Don’t rush this step. 
When yarn is cool, wash with mild detergent or no-rinse wool wash using water that is the same temperature as yarn. Rinse using water that is the same temperature. DO NOT temperature shock the wool unless you want felt at this point. I cannot over emphasize this point. It doesn’t take a lot of temperature variation to cause felting. Trust me on this. Ironically, if you actually want the wool to felt it doesn’t happen this easily.
Step 5
Drain the yarn and gently squeeze out the excess water. Hang yarn and it allow to air dry. There will be water dripping from the yarn as it dries so hang it outdoors, out of direct sunlight, or somewhere that the dripping water won’t hurt, like over the bathtub.
Step 6
Admire and enjoy your beautiful yarn.
Tabitha’s Tips
Or Lessons Learned the Hard Way
- Wear gloves. Or use a spoon.

Hands and nails absorb dye really, really, really, really well – possibly as well as yarn. - It is easier to get the dye off your hands than your nails.
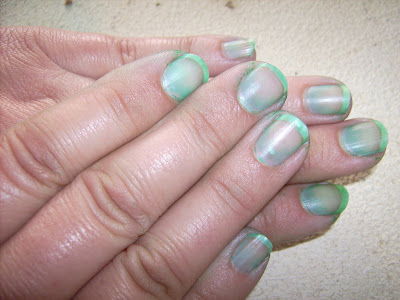
And blue-green nails have a rather unique other-worldy, Bride of Frankenstein sort of appearance. - Pay attention to the dye absorption rates. If it seems that all the dye is gone from the water after the first heat cycle, you probably need more dye. We found that the green required more dye than the blue to get good saturation. We ended up using 2 packages of dye per ounce of yarn for the green.
- If you have to add additional dye, make sure that the liquid is the same temperature as your yarn. Don’t temperature shock your yarn.
- Have fun.
We know the secrets of the Fire Swamp. So whenever you feel like dyeing, come visit.*
*The Princess Bride references. Can you tell we have watched it a few too many times lately? Just be glad the topic of this post wasn’t Mawwiage or Twoo Wuv.
Other Posts in this series.
…Prepare to Dye
Great job documenting this! It’s such a fun thing to try! You inspired me to try to dye a baby sweater I made a while back where the dye lot didn’t work.
Yes, I was a bit concerned when I saw those hands in the dye! Are you now wearing nail varnish to hide your dye job?
Love the hands and nails!! I loved Kool Aid dyeing the one time I tried it – it’s quite hard to get in the UK as it isn’t sold as a drink here!
Well you make it look easy enough, and funny I was thinkign gee I;d be wearing gloves and then saw your lesson learned. LOL
Nice nails too, lol
Love the colors-that is going to be a really pretty bag. I will admit as I was reading the post, one of the first things I thought was-oh no, I don’t see any gloves! (Don’t do that with walnuts either…ask me how I know).
GREAT JOB!!!!!!!
Dyeing is so much fun. Glad you enjoyed it and I can’t wait to see this purse!
OHhh boy!!! I could have lots of fun with this one. Love how the yarn turned out. How did you keep it from getting tangly? Note to self: don’t stir yarn with your face