
Sometimes when designing, you want to separate design elements by a large block of repeated stitches. Unfortunately, that means that you need to count boxes in the grid to know where the next design element begins. This is where annotating your knitting chart comes in handy. This tutorial will help you use this great Stitchmastery tool to your advantage.
What are annotations?
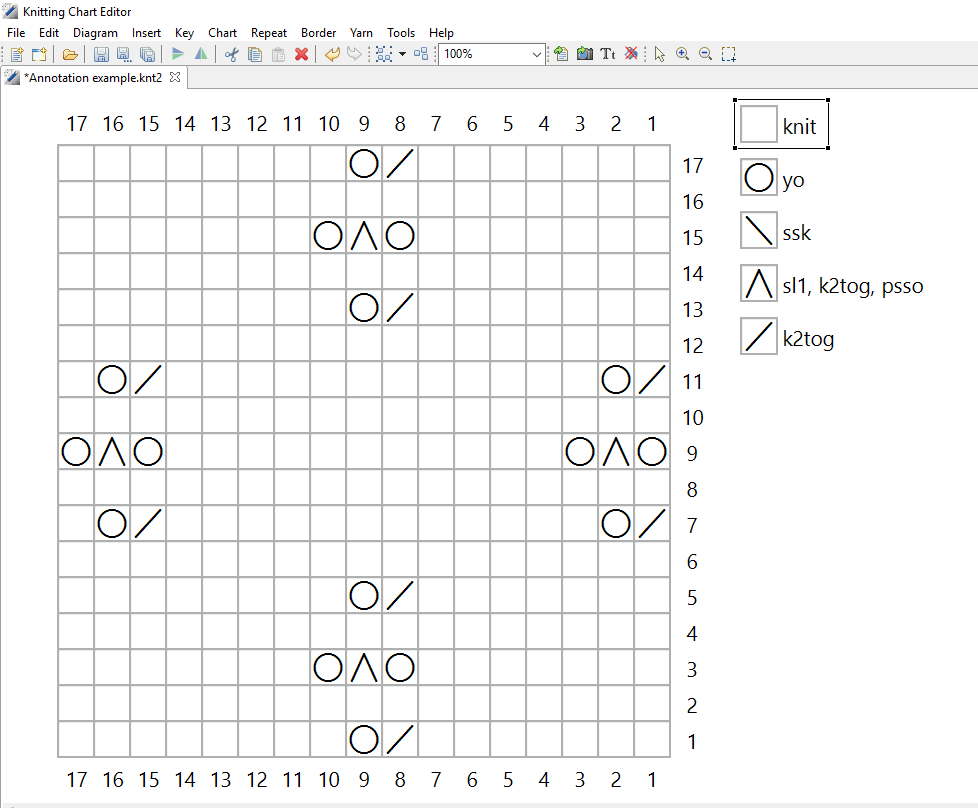
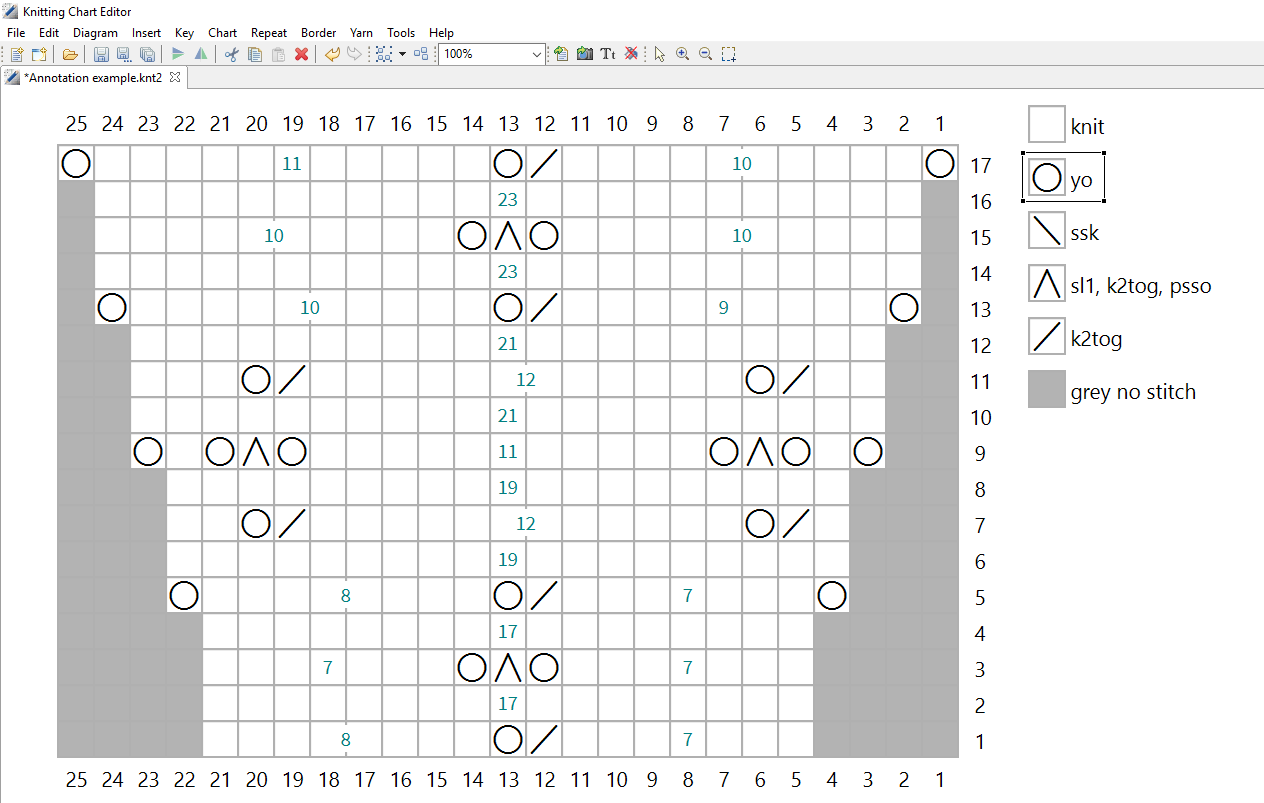
First, let me show you a simple Stitchmastery chart where the lace elements are separated by a background of stockinette stitch. As you can see, you will have to do a bit of counting to know where to begin the next lace element. (click on the photos to zoom)
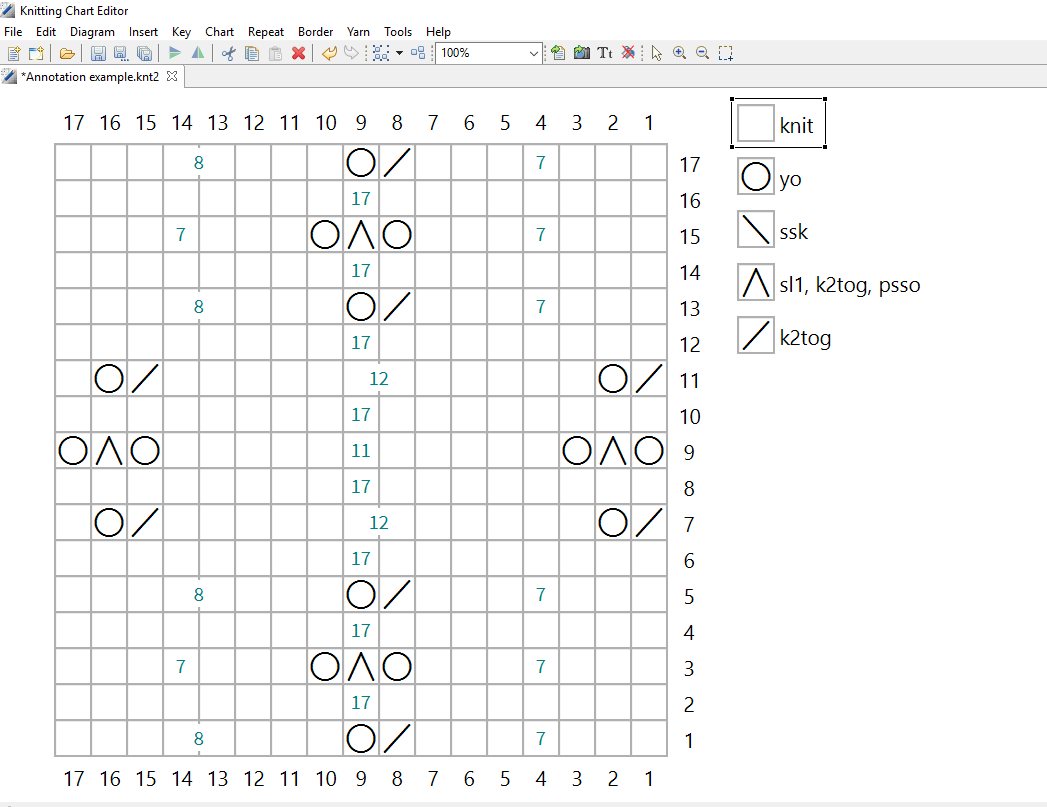
But with annotations added, you can tell at a glance how many knit stitches there are between these lace elements.
How do you add annotations to a chart?
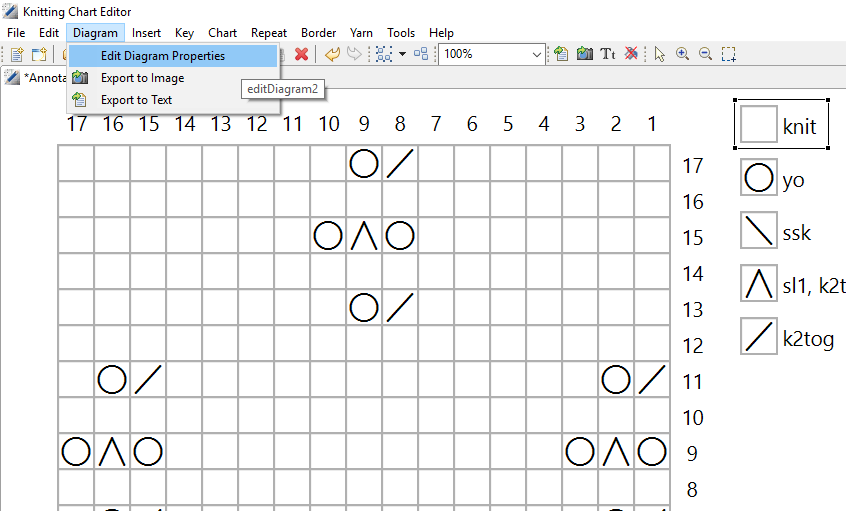
So, how do you add these cute little numbers? First, click on the Diagram tab at the top left of the Stitchmastery pane.
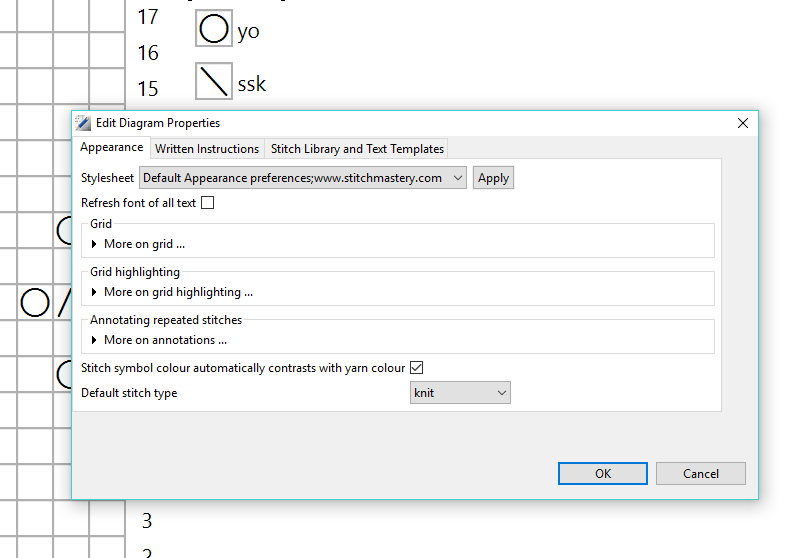
Then, select Edit Diagram Properties from the drop down menu.
This will take you to the main Diagram editing pane.
From this pane, you can adjust the most of the customizable elements of Stitchmastery. In this case, we want to adjust annotations so we will click the arrow next to “More on annotations.”
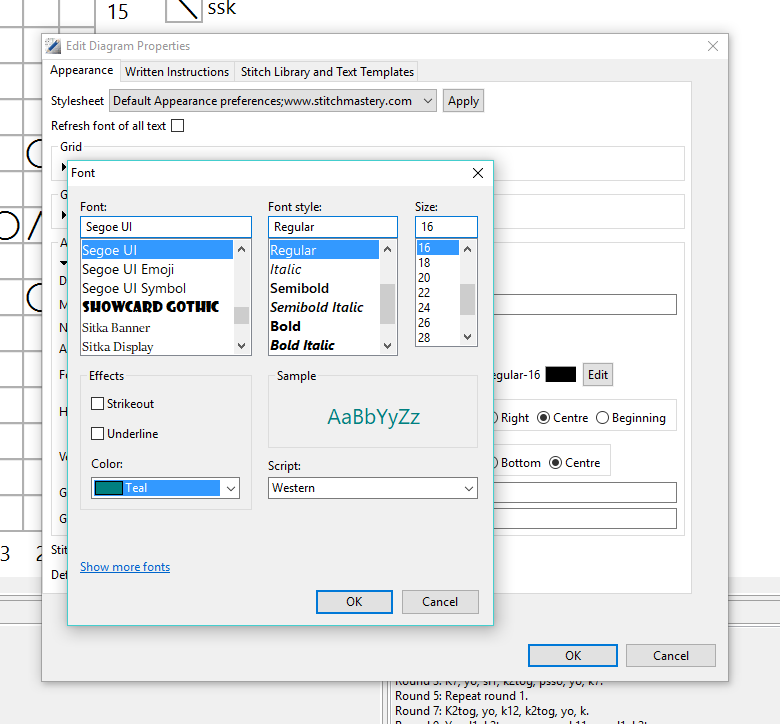
In the annotations menu, you will be able to customize the appearance of the annotations. You can select how often they appear, the horizontal and vertical position in the chart, and the amount of buffer space around the text. You can also select the repeated stitch to annotate.
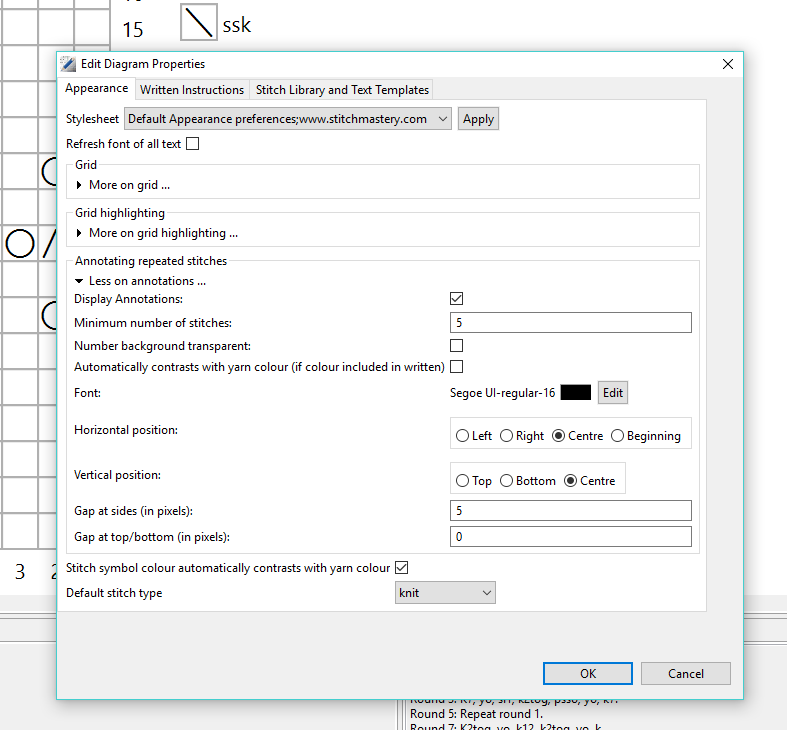
Stitchmastery even allows you to customize the font style and color to fit your brand.

Are there other uses for annotations?
Even if you don’t leave the annotations in the final version of the chart, they are handy for working out math for the increases, decreases, and transition sections in your design. Simply turn the annotations on when you start charting, use them to get all of the elements of your design placed just where you want them. Then go back to the Edit Diagram menu to turn the annotations off. Notice how easy it is to check the stitch counts in each row. This is a very simple chart so the annotations aren’t really necessary but I am sure you can see how useful this could be in complex lace or cables. It is even handy with colorwork.
I hope you find annotations a handy tool with your designing. If you have found another way to use them that I haven’t covered here, leave me a comment or email me so I can add that to a future tutorial.
You can find out more about Stitchmastery software on their website.